Installing
Mac
Open the DMG-File, and drag the application into your applications-folder.
Win
Run the installer, and follow the steps.
Enter License Key
On first start, the license key dialog window will appear. Please enter your license key (via copy/paste). If the license key is correct, you have to restart the application again.
Important: If you have installed the demo version, you are not able to enter the license key. Please install the software from the link that is provided after purchase. You don't have to uninstall the demo first.
Important: If you have installed the demo version, you are not able to enter the license key. Please install the software from the link that is provided after purchase. You don't have to uninstall the demo first.
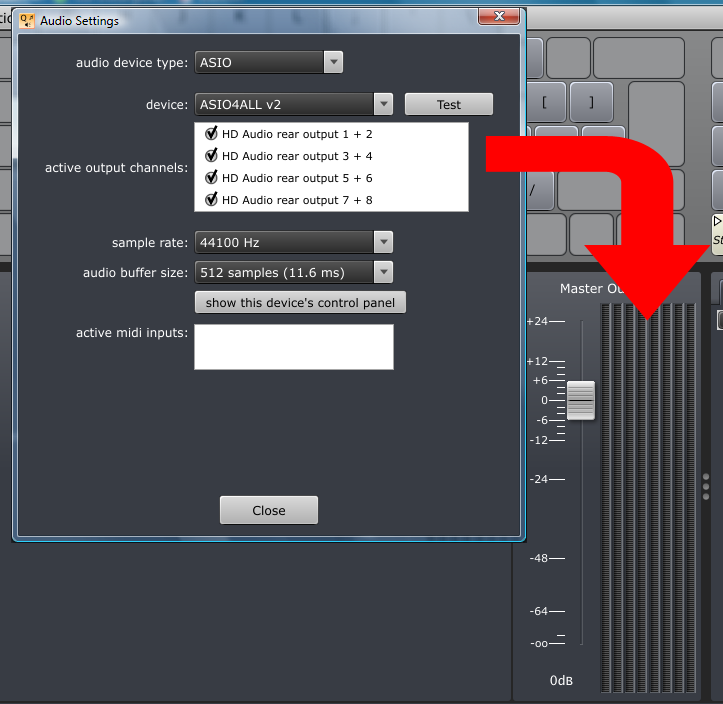
Audio Setup
If you want to be able to playback sounds on multiple channels, please select a device which handles multiple channels. Up to 8 channels are possible. You can active/deactivate channels by clicking on it. You can activate up to 4 stereo channels, which results in 8 tracks you will see in the master output display.
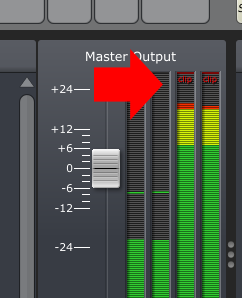
Master Output
Change the Volume for all audio output channels. Please note the output-sound should not clip. When this happens you see a red indicator "clip".
Audio Files
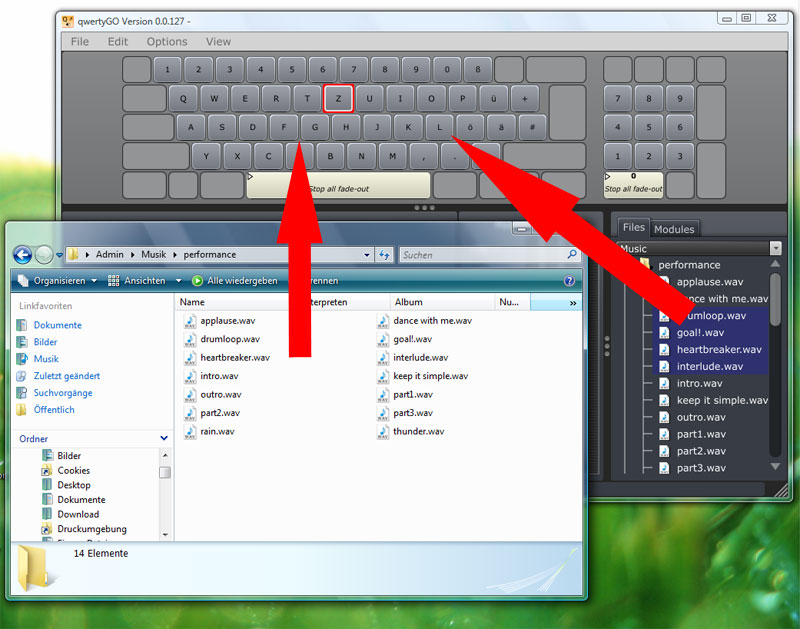
Import a Audio File
Just drag one or more files from the file tree (on the bottom right) or from the Finder/Explorer into the keyboard display.
You also can move the keys inside the keyboard.
Play Modes
Select the key, which you want to edit.
There are different types of "Play Modes" you can select for a key: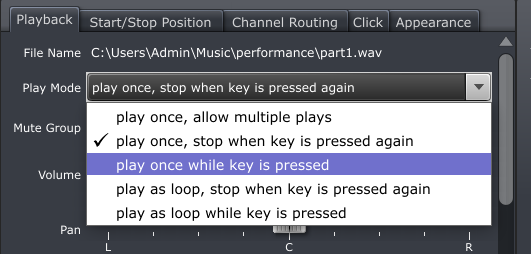
There are different types of "Play Modes" you can select for a key:
- play once - allow multiple plays: every time you press the key, the sound will be played, until the end. More sounds can be played simultaneously.
- play once - stop when key is pressed again: start and stop the sound with the same key
- play once - while key is pressed: sound plays, as long the key is down
- play loop - stop when key is pressed again: sound plays in a loop, between the left and right locater, stops when the key is pressed again
- play loop - while key is pressed: sound plays in a loop, between the left and right locater, as long the key is pressed down
Mute Groups
If two or multiple keys have the same mute-group, only one will be played, others will be muted automatically. Please notice the sound will not stop immediately, it uses the fade-out time (see below)

Trigger Groups
All Keys with the same "Trigger Group" will start parallel, like all keys with the same "Mute Group" will stop parallel, when starting one of them.
other Playback parameters
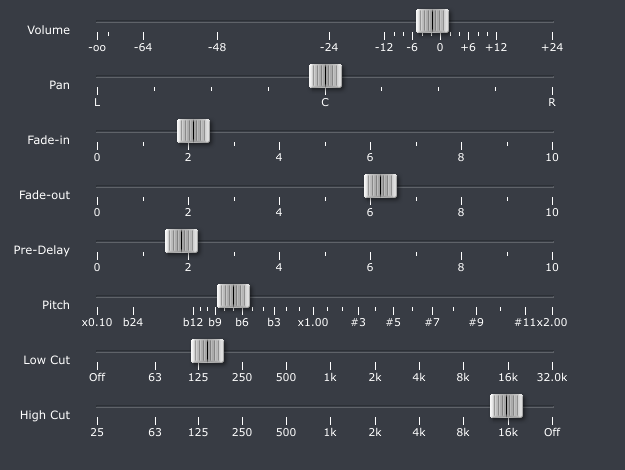
- Volume: change the volume via dragging the slider
- Pan: change the panning from left to right. Panning has an effect on the first and the second channel of a sound file.
- Fade-In: the sound will not start immediately, it will fade-in in a adjustable time
- Fade-Out: the sound will not stop immediately, it will fade-out in a adjustable time
- Pre-Delay: use this parameter, to add a period of time before the playback begins
- Pitch: change the playback speed of a sound
- Low-Cut: if you drag this slider to higher frequencies, lower frequencies will be cut from the signal
- High-Cut: if you drag this slider to lower frequencies, higher frequencies will be cut from the signal
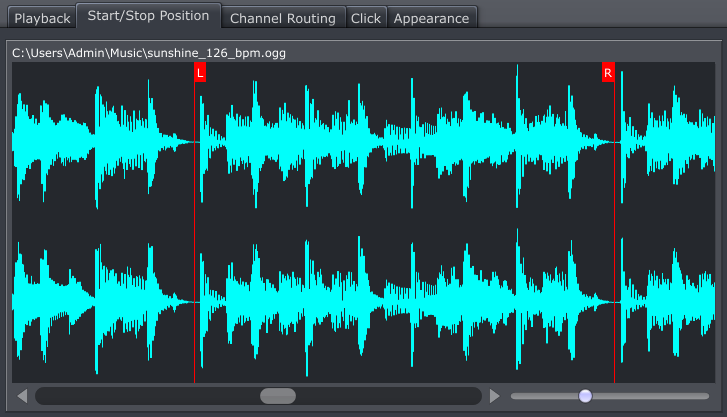
Start/Stop Position
The playback will be begin at the left-locater and will be played until the right-locater is reached. Please note if you use a fade-out, the sound will be played also after the right-locater (with the given fade-out time). For zooming in, hold the mouse-button on the waveform and drag vertically.
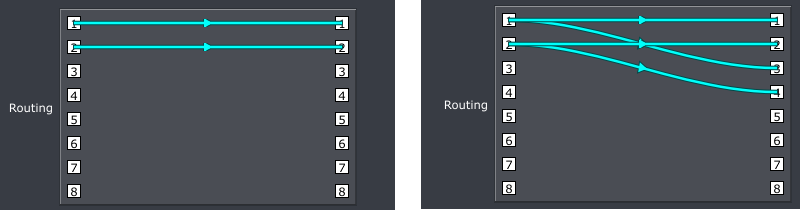
Channel Routing
As you see in the Audio Device Configuration, you are able to select multichannel audio devices. So with this control you can change which output channels are used for a certain key. Just drag a wire (while pressing the mouse key) from the left (sound-output) to the right(master-output) connections points to add a connection, or drag them into clear space to remove them.
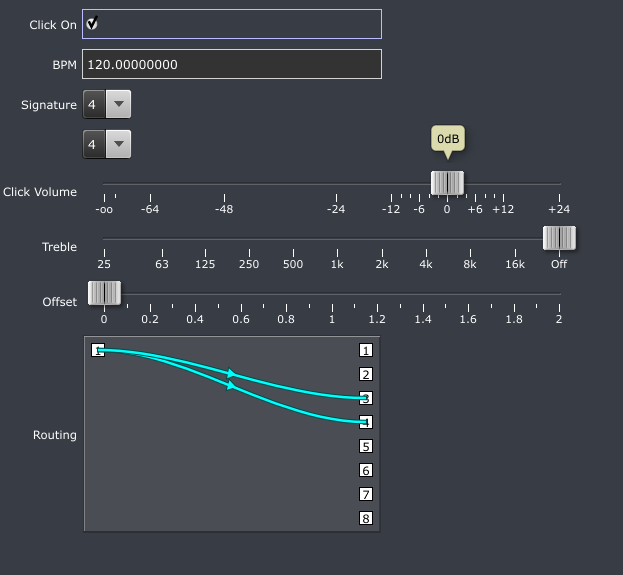
Click
You can play along a metronome-click with the sound. For example if you want to create a metronome-click for you drummer to be synchronized to a playback: Enter the BPM (Beats per Minute). Please note the file should begin at a bar (if not use the offset fader, to synchronize the click with the song.)
Modules
For using modules, please drag them into the keyboard display.
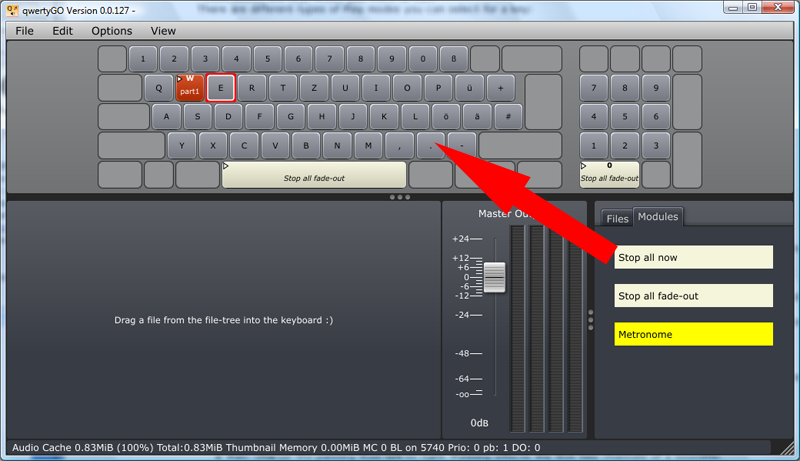
Metronome
You can also use the click functionality without a sound-file, as a pure metronome. Start and stop the metronome with a key press.Stop all now
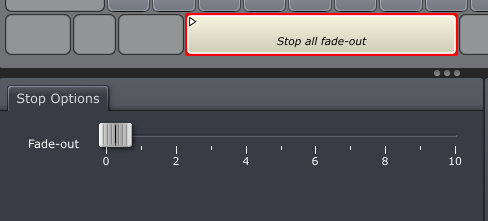
Stops all playing sounds immediately.Stop all - fade -out
Stops all playing sounds in a given fade-out time. Drag the fader to change the fade-out time.Audio In Through
Use the "Audio In Through" module to route an incoming audio signal. You can switch in on/off via pressing the associated key.
In the Settings Panel (down below), you can see how the routing will be configured. For example you can connect the input channel 4 to the output channel 5. If you press the button incoming audio of channel 4 will be routed to output channel 5.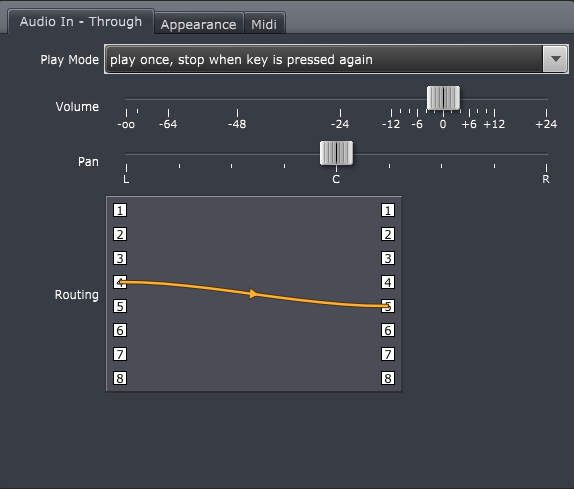 Please note this is always related to the internal routing of the qwertyGO node in the Audio Channel Environment, so if you connected the qwertyGO-Node in the Audio/Plugin environment (see below) in a different way, the result will be another.
In the Settings Panel (down below), you can see how the routing will be configured. For example you can connect the input channel 4 to the output channel 5. If you press the button incoming audio of channel 4 will be routed to output channel 5.
Queue Trigger
See chapter "Queues".
Queues
A queue enables you to trigger different sounds with the same key. You can create multiple queues in one project.
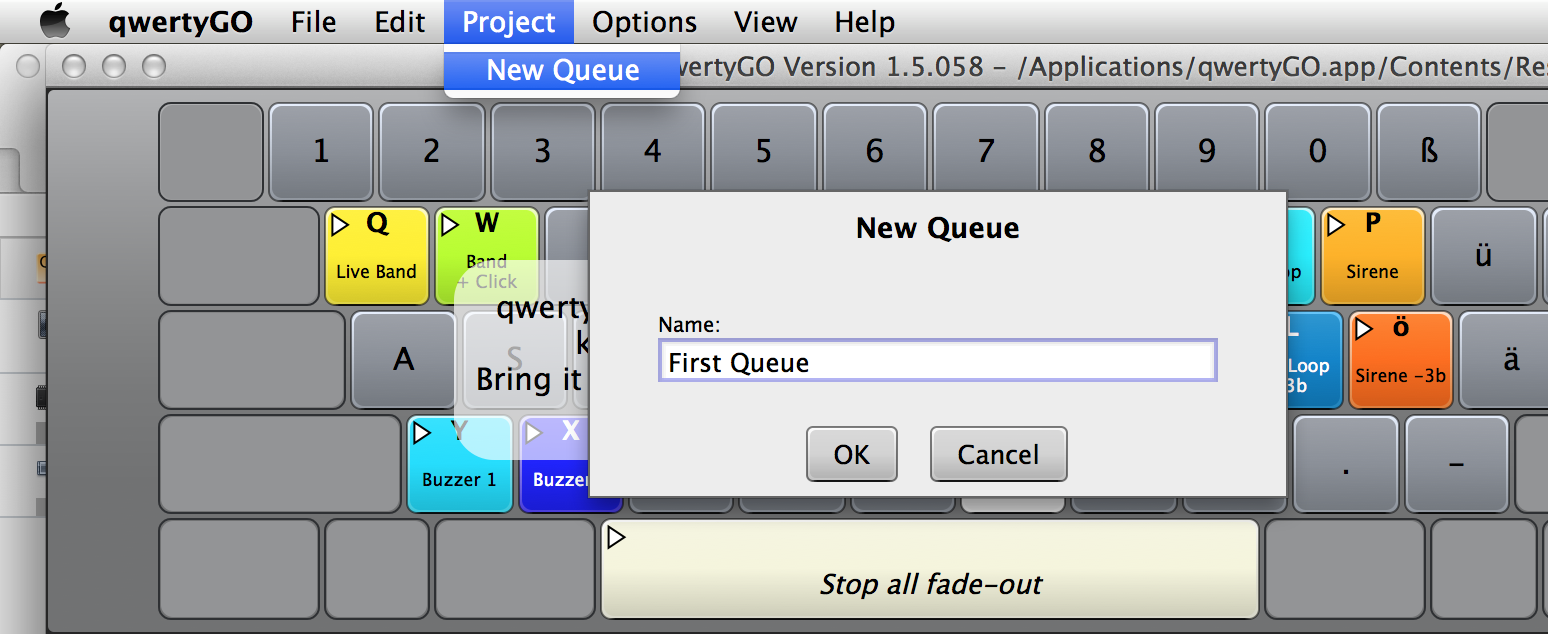
create new queue
Click on the menu "Project" -> "New Queue". Enter the name for the new queue, and click "OK". You can change the name of the queue later, by double-clicking on the queue name.
Now you can add sounds to you queue, just drag files into the queue-items. To trigger an item in the queue click on the "Play Next" button. The white arrows indicates which item will be played next.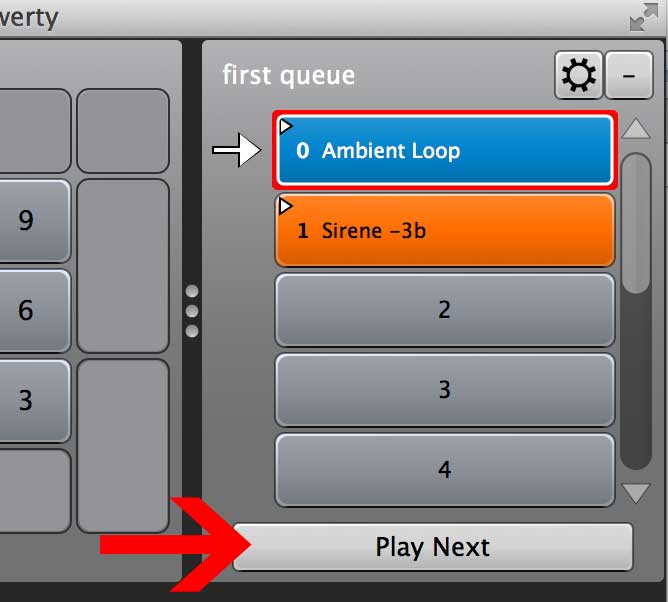
Now you can add sounds to you queue, just drag files into the queue-items. To trigger an item in the queue click on the "Play Next" button. The white arrows indicates which item will be played next.
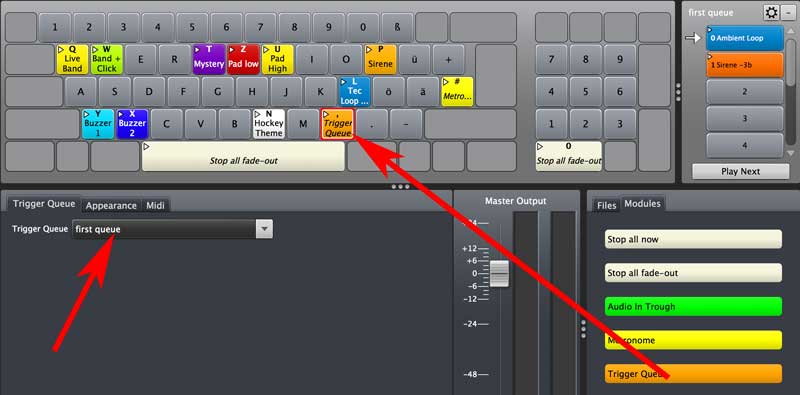
trigger queue via key/midi
To trigger a queue via a keyboard, just move the "Trigger Queue" module into a specific key which should trigger the key. Please select the queue in the drop-down menu below. You can also define a midi-key which should trigger the queue.
queue options
Click on the wheel to access the queue options menu.
solo play
If you trigger the next item, the previous one will automatically muted.
repeat all
After you played the last item in the list, the locator will jump to the first item.
auto reset
In some occasions it could be helpful if the locator jumps back to the first item, after the queue was not triggered after a certain time.
delete queue
Click on this to delete the queue.
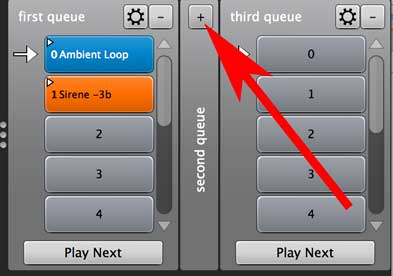
minimize/maximize queue
To save space on the screen, you can use the small "-" button, to minimize the queue. Click on "+" to maximize the queue again.
additional functions
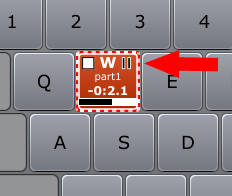
Pause
You can pause a playing audio file, press the small " symbol, inside the key. If you press the key again, the sound will be played again from the same position where it stopped.
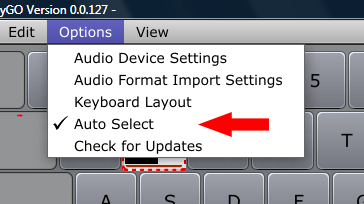
Auto-Select
You can toggle Auto-Select On/Off, via the Menu. With auto-select, a pressed key will be selected automatically when you press it.
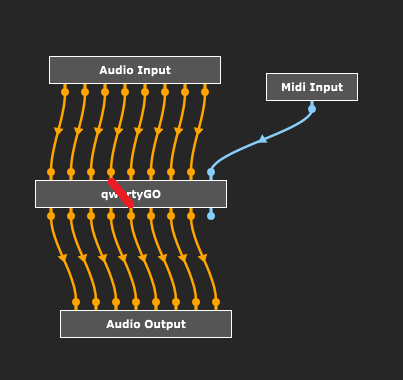
Audio Plugin Environment
The Audio Plugin Environment is a schematic overview of the audio process flow of qwertyGO. The audio signals can be processed with VST (Virtual Studio) and AudioUnit (Mac only) plug-ins.
To be able to use them you have to first scan all available AU and VST plug-ins, press "Options" -> "scan for new or update AU-Plugins" or "scan for new or updated VST Plugins". While the scan is processing, the app may be not respond to user interactions, just wait until the scanning is finished.
In the left area you the the "qwertyGO" node, please note the all available outputs (the "pins" below the "qwertyGo" box) are connected to the output.
Example:
If you want to use the build-in plug-in "StandardEQ" for the output "channel 1+2" drag the "StandardEQ"-text from the right panel into the left area, and than connect the outputs of the qwertyGO to the StandardEQ, and from StandardEQ to the output. Just hold the mouse-button down and drag from one pin to another to create a new cable. To remove one cable, just drag a cable, into an empty place.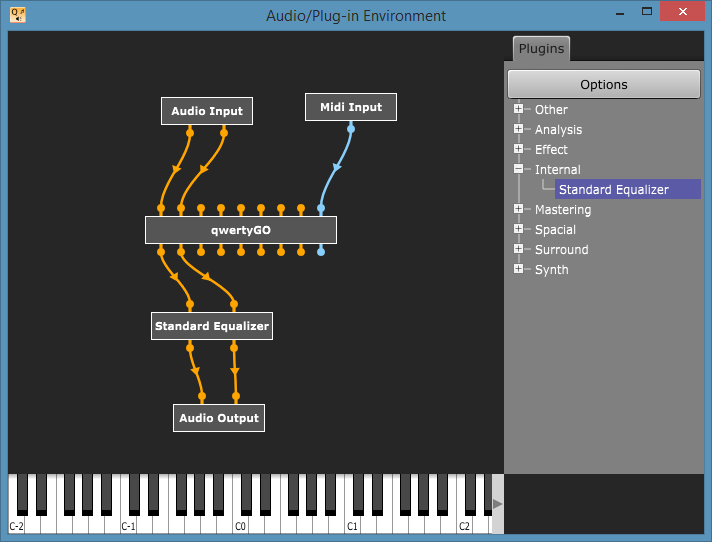
StandardEQ
qwertyGO now includes a built-in Version of the SIR Audio Tools product StandardEQ in the Audio Plug-in Environment.
Options
16 channel output option
If you want that qwertyGO support more then 8 output channels, you can extend the available channels to 16. Please note that some of the GUI Controls also will change.
Appearance Settings
Change the default colors of the qwertyGO User interface. Some colors, will not change immediately, you have to restart the application first.